Two posts in one weekend and it’s stowage time! Apart from painting, adding the stowage is probably my favourite part of building tanks. Stowage is great for personalising your vehicles and for making them look ‘lived in’.
Re-examining
the photograph I noticed that the bit of the turret
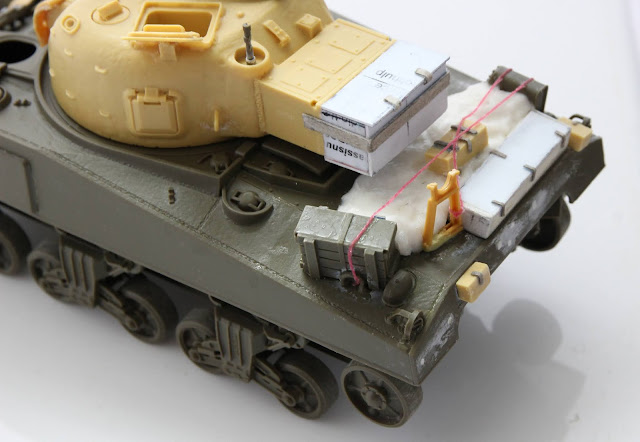
with the number 35 painted on it was not the back of the armoured bustle for
the radio, but actually a stowage box mounted to the back of it. I could’ve
purchased a resin kit, but decided that I had spent enough money on this
project and instead scratch built one. I used the plastic from an expired
Toyota service card, so depending on how you look at it this is either the
cheapest or the most expensive bit of customisation ever. For the hinges I used
thin cardboard glazed with super glue, which will hopefully make it less
absorbent when it comes to painting. The large stowage box on the rear of the
engine deck was made in a similar fashion.
The
rolled-up tarp I made using some toilet paper soaked in watered-down wood glue.
I then shaped it and added creases and the like using the back of a paint
brush. The creases don’t show up in the pictures particularly well, but I’m
assuming they will after a coat of paint. I let the glue dry overnight and then
gave it a coat of clear furniture varnish to strengthen it. I also added two
more boxes made of bits of resin sprue with cardboard hinges, which were again
glazed with superglue. Ropes securing the stowage were made with a bit of
pretty pink embroidery thread kindly provided by my wife.
Finally, I also added the gun travel lock. I forgot how brittle resin is compared to plastic, so when trying to cut it from its sprue it broke, sending the bottom portion flying off into the void never to be seen again. I did a pretty poor job of filling in the gab with some Miliput, but I hope it won’t be as obvious once everything is painted.
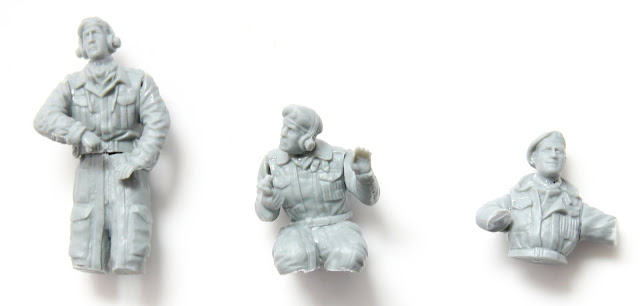
The last part construction-wise was assembling the crew. I felt a little uncomfortable hacking off their limbs to make them fit inside the tank, but they look great. I’ve got a bit of filling and filing to do on the joints, but that pretty much wraps up the build. Next up, painting!


Comments
Post a Comment